This guide shows how quickly you can create beautiful and professional popups using Popup Maker and Beaver Builder. Check out this quick demo.
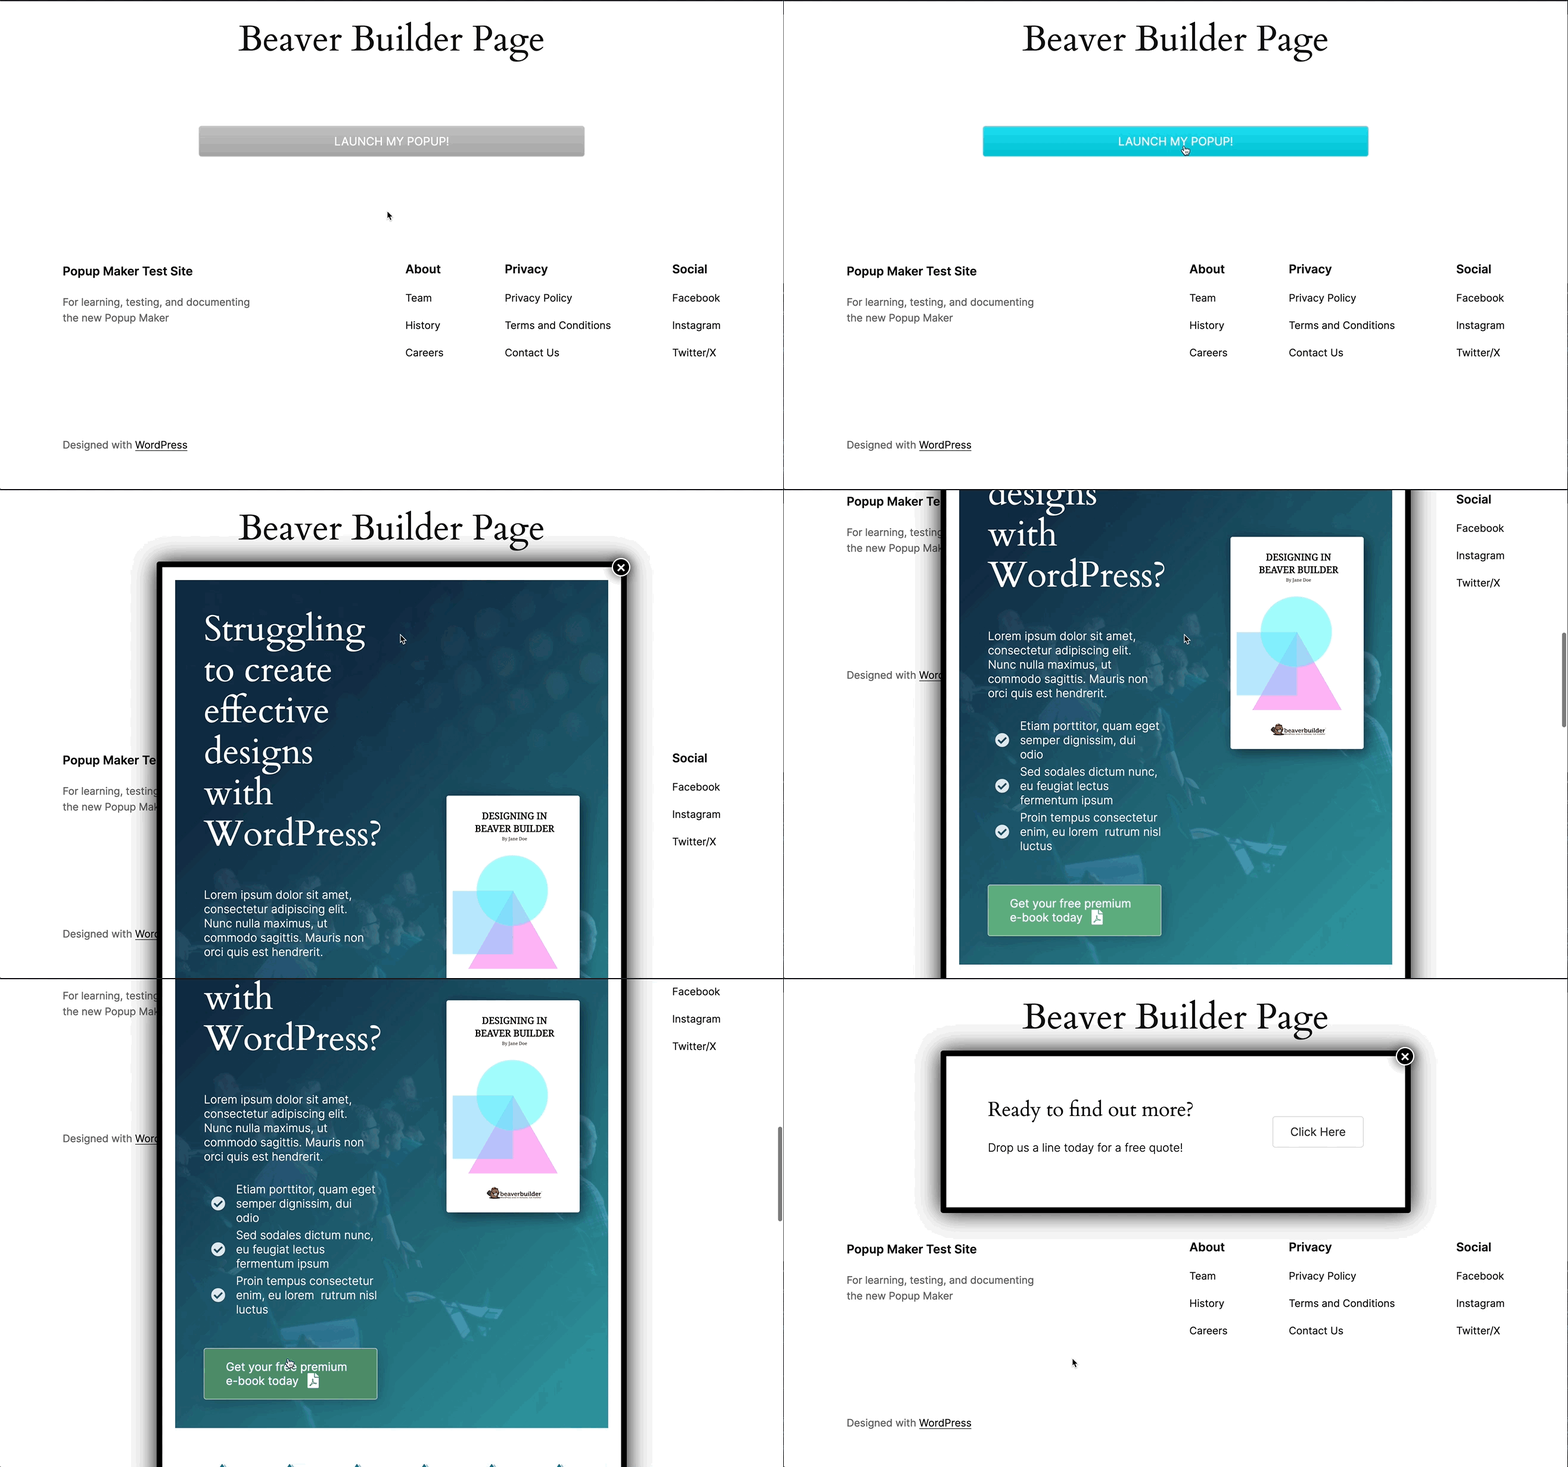
TO DO: Quick recap of the demo.
TO DO: State the goal of the steps below.
Follow these simple instructions, and you too can enrich visitor experience and drive conversions on your site with engaging popups.
Let’s dive in!
1. Choose a saved Beaver Builder layout
Start by creating a new layout or choosing a pre-made template.
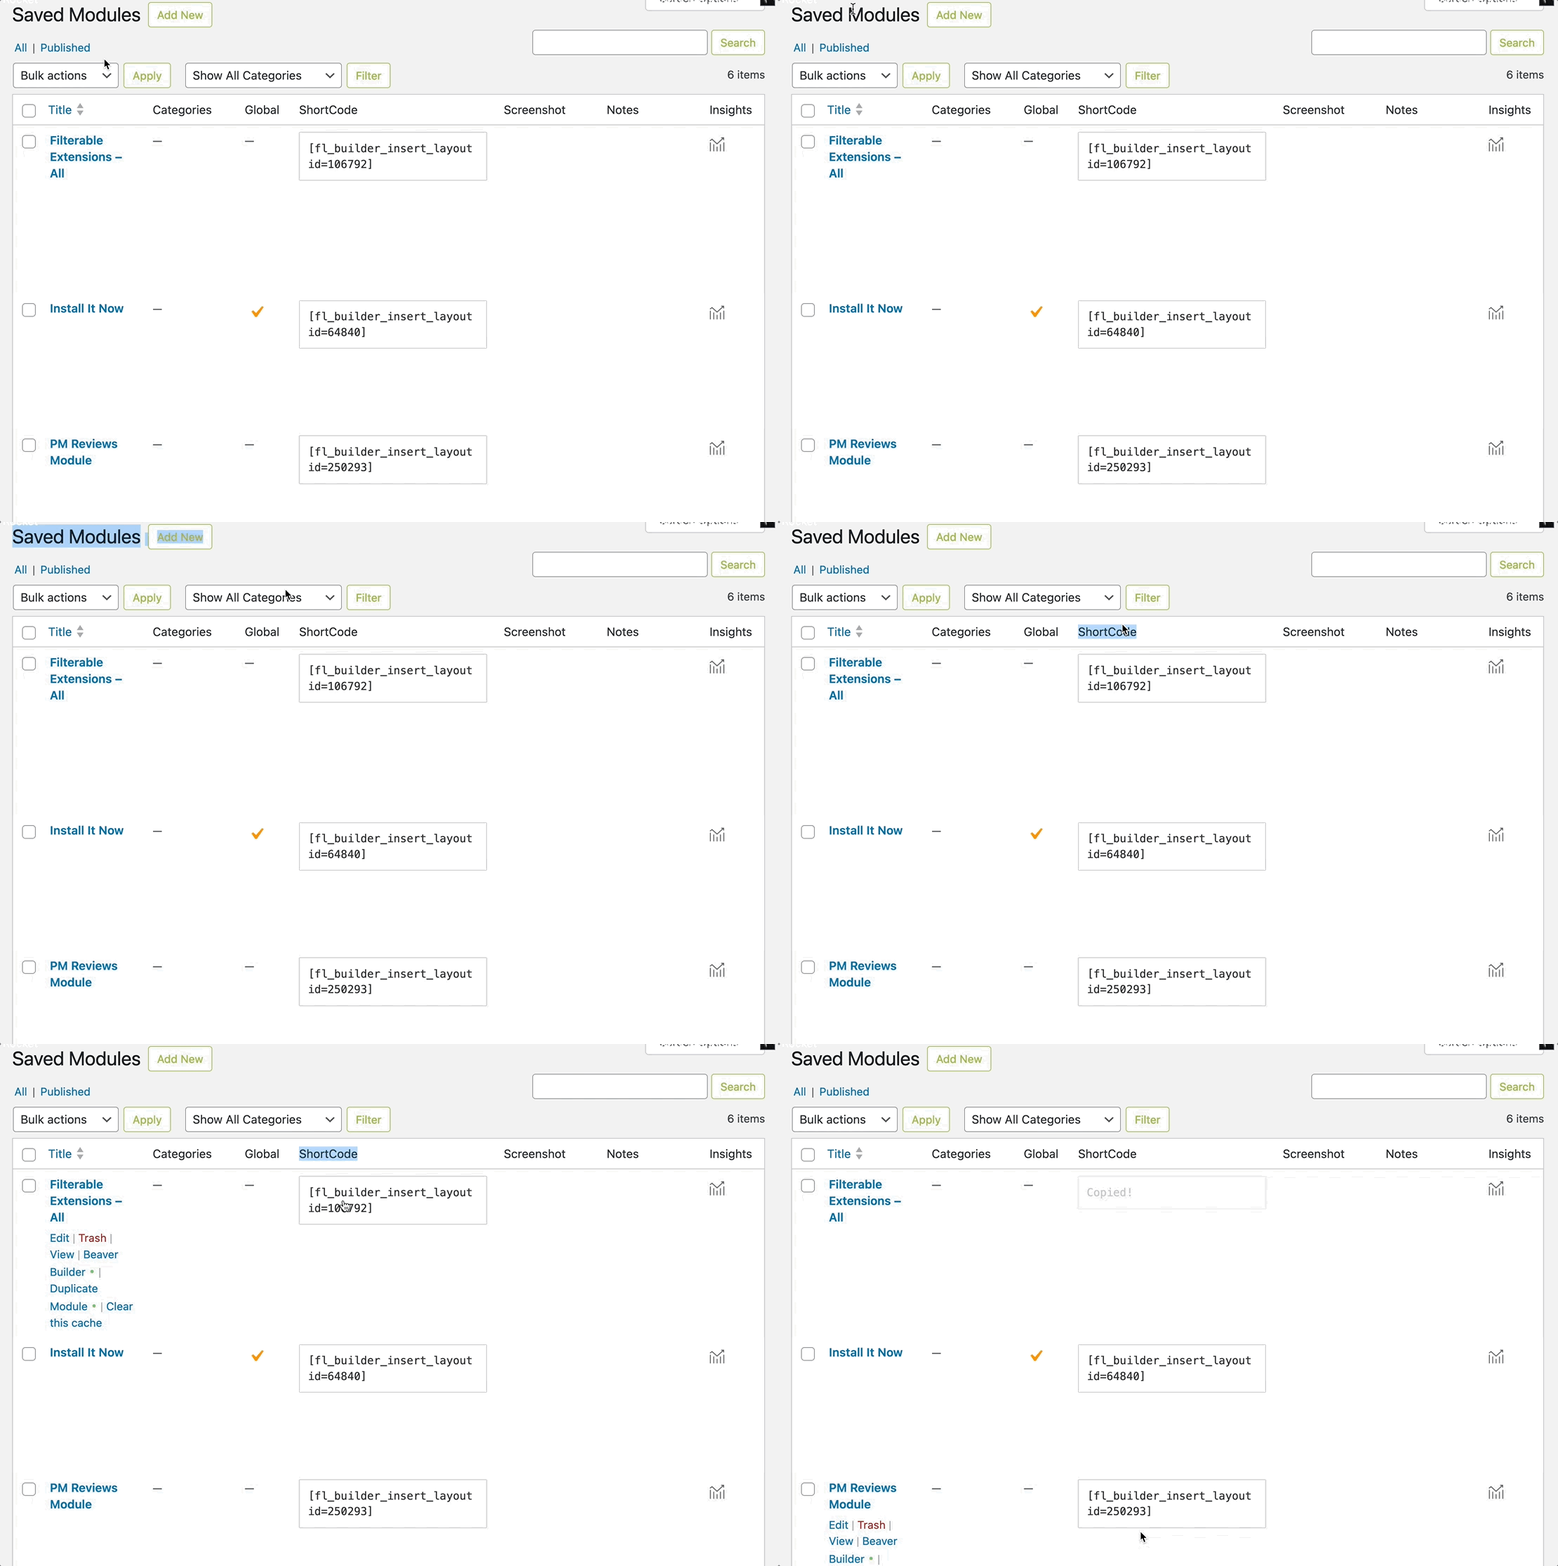
2. Copy the layout’s shortcode
Copy the shortcode for your saved Beaver Builder layout.
3. Edit a Popup Maker popup
Create a new popup or edit an existing one.
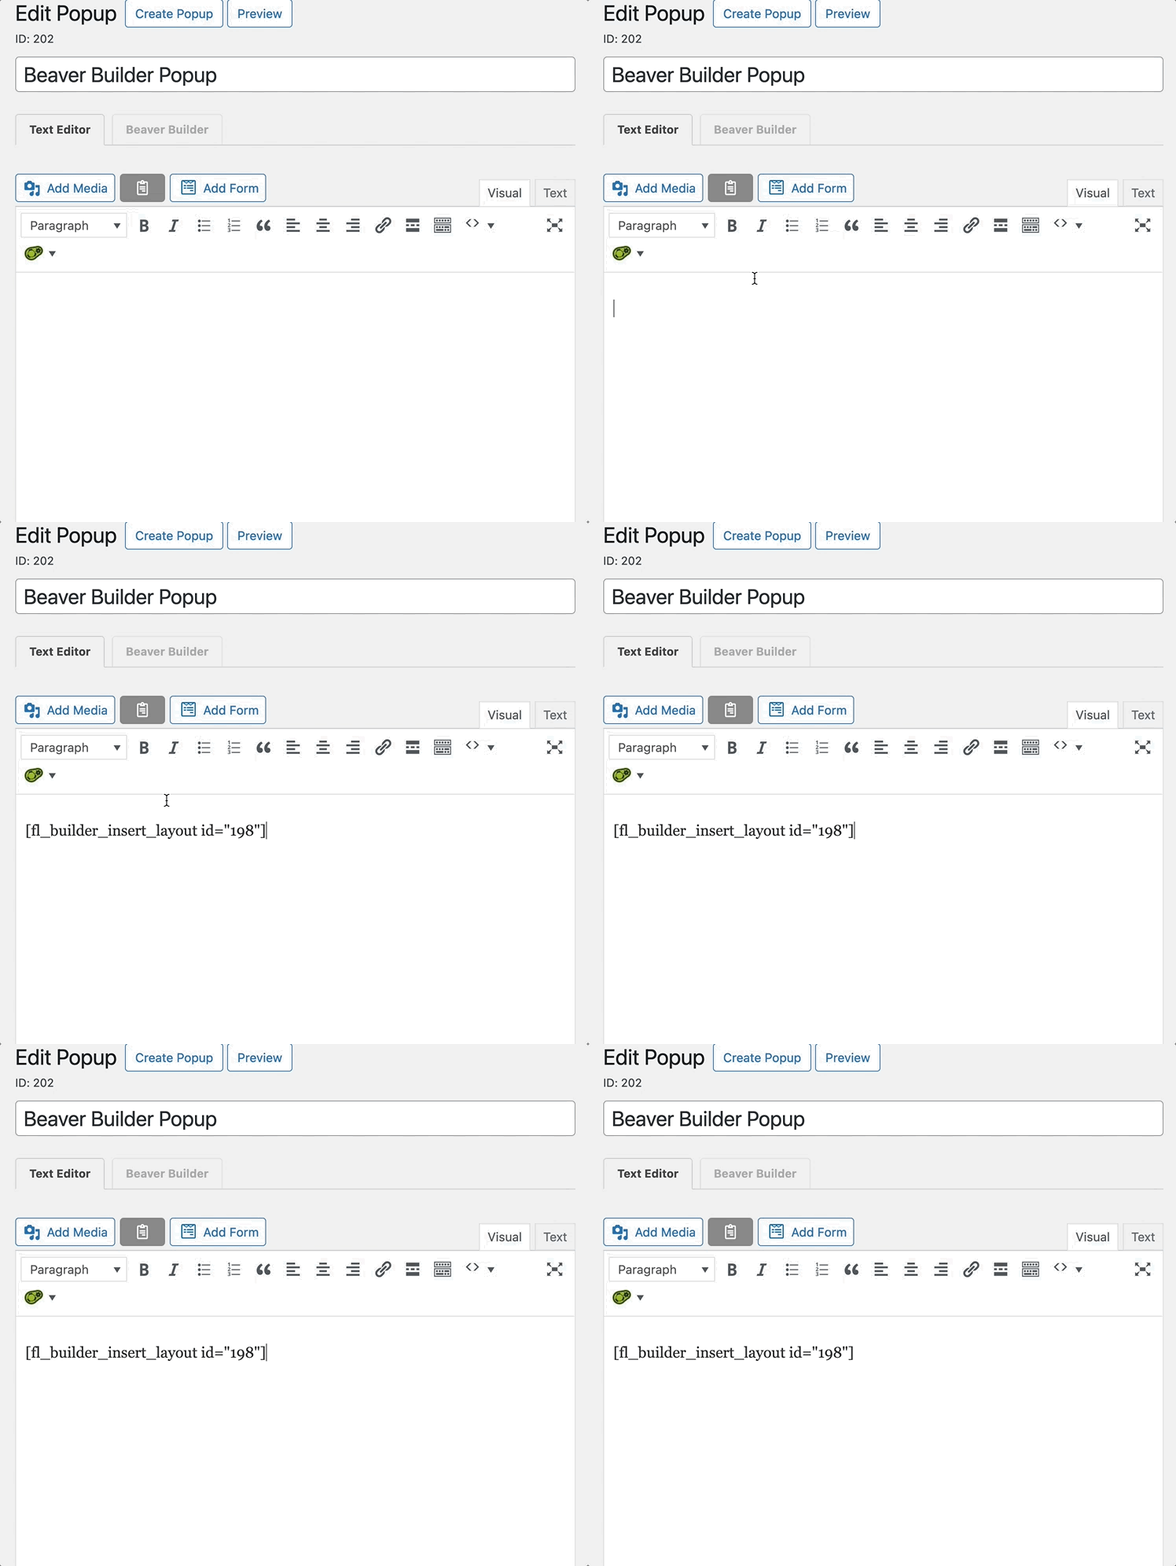
4. Paste the Beaver Builder shortcode
Paste the shortcode into the popup editor to add your Beaver Builder layout to your popup.
5. Set up a popup trigger
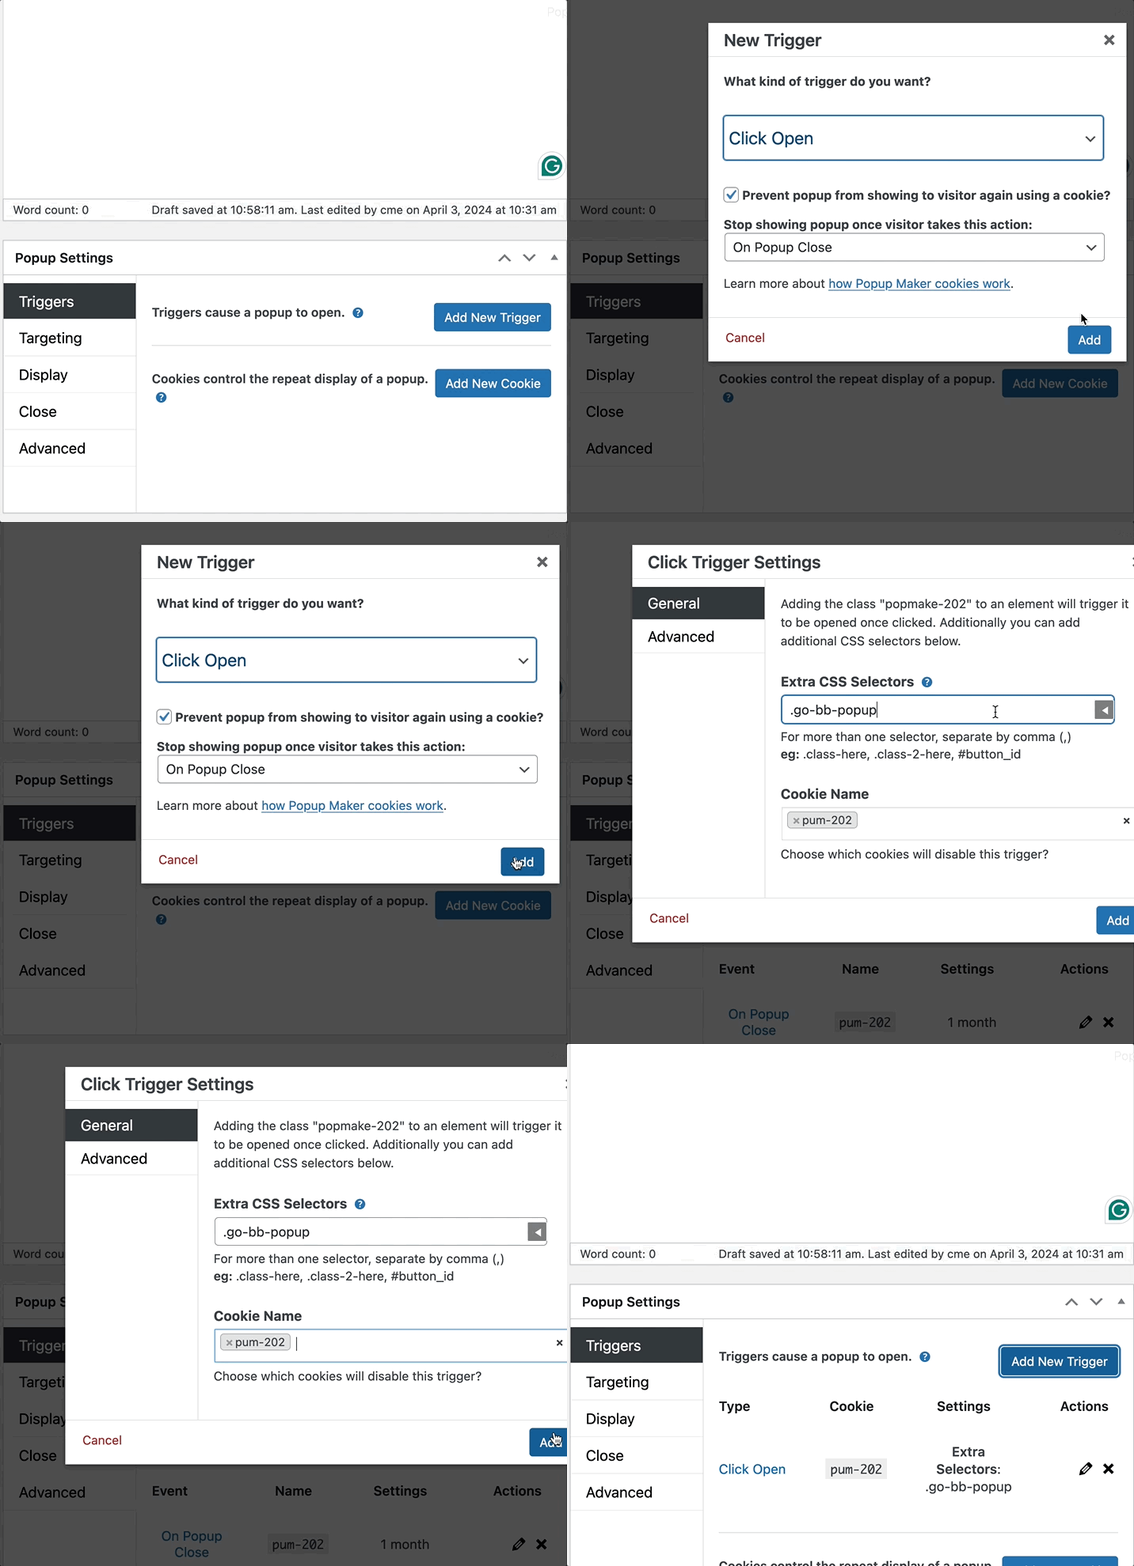
Set up a popup trigger to make the popup appear on your website.
Be sure to add an Extra CSS Selector, e.g., .go-bb-popup. We’ll add that to your Beaver Builder button in a sec.
Optionally, add a cookie to control how often a visitor sees the same popup.
If needed, add a targeting rule to specify where the popup should appear (e.g., a specific post or page).
6. Save your popup edits
Save or publish your changes to make the popup live on your website.
7. Connect your Beaver Builder button to the popup
Remember that Extra CSS Selector that you added back in step 5?
TO DO
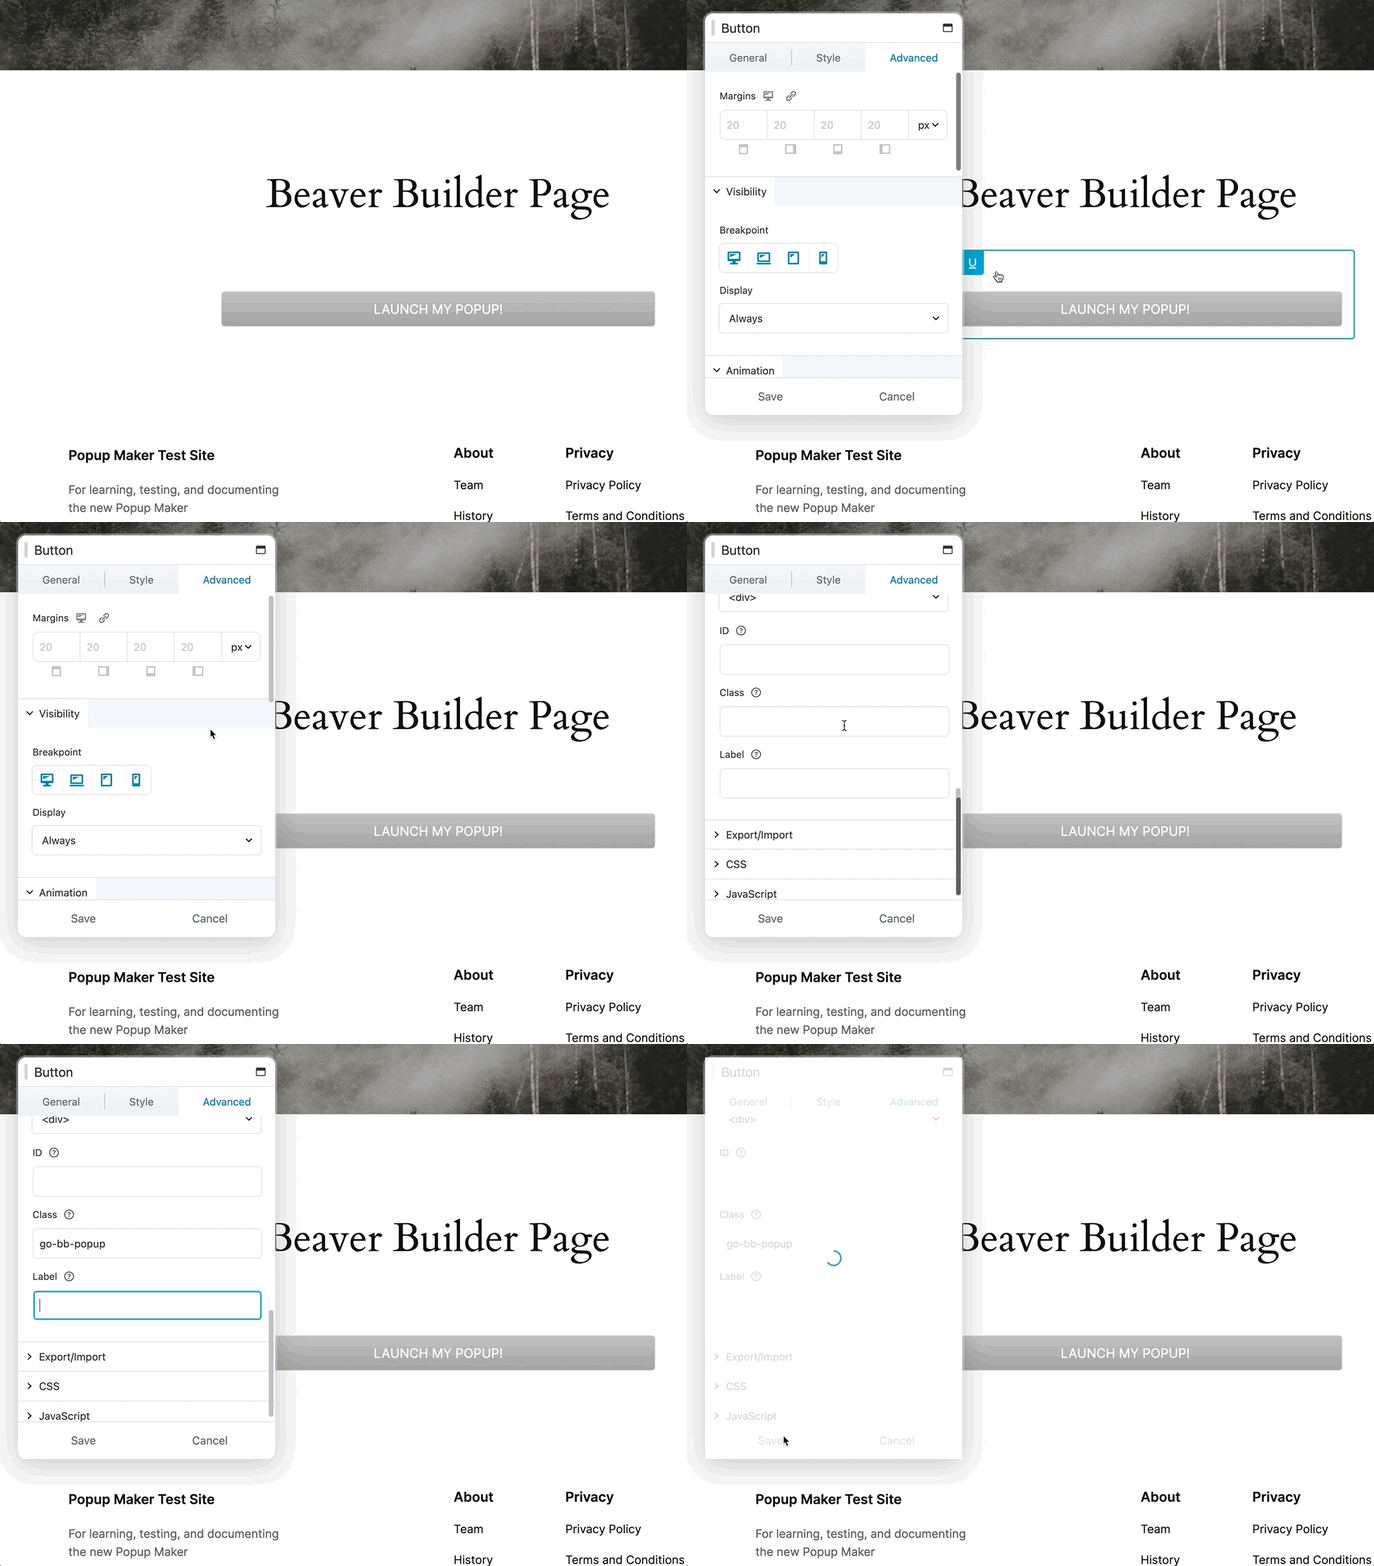
8. Save your Beaver Builder edits
TO DO
That’s it! Just follow these steps to create and set up your popups.